Замена основного жесткого диска Dell Alienware 14
В этом руководстве показано, как извлечь и установить основной жесткий диск.
Шаг 1
WARNING: Before working inside your computer, read the safety information that shipped with your computer and follow the steps in Before You Begin. . After working inside your computer, follow the instructions in "After Working Inside Your Computer".
Close the display, and turn the computer over.
Шаг 2
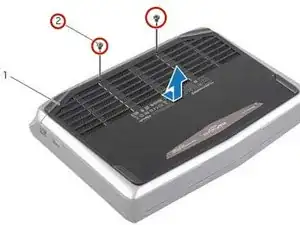
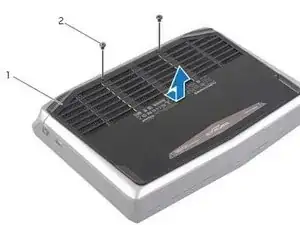
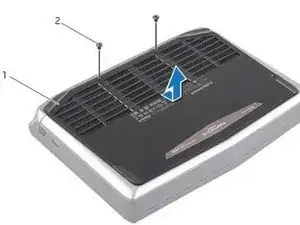
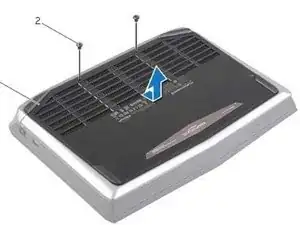
Remove the screws that secure the base cover to the computer base.
Шаг 3
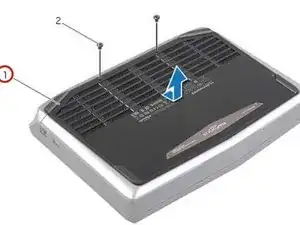
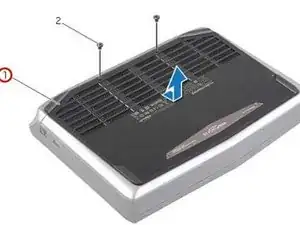
Slide and lift the base cover off the computer base.
Шаг 4
Align the tabs on the NEW base cover with the slots on the computer base and slide the base cover into place.
Шаг 5
Replace the screws that secure the base cover to the computer base.
Шаг 6

Turn the computer over and open the display.
Шаг 7
WARNING: Before working inside your computer, read the safety information that shipped with your computer and follow the steps in Before Working Inside Your Computer. After working inside your computer, follow the instructions in After Working Inside Your Computer.
Disconnect the battery cable from the system-board connector.
Шаг 8
Remove the screws that secure the battery to the computer base.
Шаг 9

Using the battery cable, lift the battery and release it from the tabs on the computer base.
Шаг 10
Turn the computer over and open the display as far as possible.
Шаг 11
Press and hold the power button for five seconds to ground the system board.
Шаг 12
Close the display and turn the computer over.
Шаг 13

Align the tabs on the NEW battery with the slots on the computer base.
Шаг 14
Align the screw holes on the battery with the screw holes on the computer base.
Шаг 15
Replace the screws that secure the battery to the computer base.
Шаг 16
Connect the battery cable to the system-board connector.
Шаг 17
WARNING: Before working inside your computer, read the safety information that shipped with your computer and follow the steps in Before Working Inside Your Computer. After working inside your computer, follow the instructions in After Working Inside Your Computer.
CAUTION: To avoid data loss, do not remove the hard drive while the computer is On or in Sleep state.
CAUTION: Hard drives are extremely fragile. Exercise care when handling the hard drive.
NOTE: The secondary hard-drive or solid-state drive is optional and can be installed in the optical drive bay.
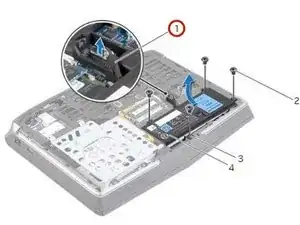
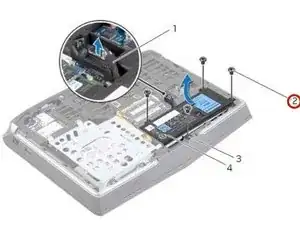
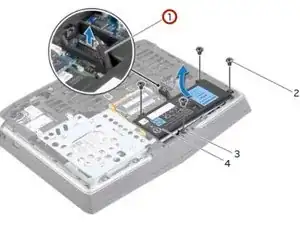
Remove the screws that secure the secondary hard-drive assembly to the computer base.
Шаг 18

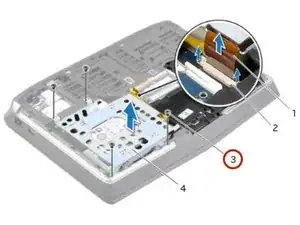
Carefully lift the secondary hard-drive assembly and then lift the latches to release the secondary hard-drive cable from the system-board connector.
Шаг 19
Lift the secondary hard-drive assembly off the computer base.
Шаг 20
Turn the secondary hard-drive assembly over.
Шаг 21
Remove the screw that secures the secondary hard-drive assembly to the main bracket.
Шаг 22

Remove the screws that secure the secondary hard-drive to the secondary hard-drive bracket.
Шаг 23

Slide and lift the secondary hard-drive off the secondary hard-drive bracket.
Шаг 24

Disconnect the interposer from the secondary hard-drive connector.
Шаг 25

Connect the interposer to the secondary hard-drive connector.
Шаг 26
Поместите НОВЫЙ дополнительный жесткий диск в кронштейн дополнительного жесткого диска.
Шаг 27

Выровняйте отверстия для винтов на дополнительном жестком диске с отверстиями для винтов в кронштейне дополнительного жесткого диска.
Шаг 28
Вверните винты, крепящие дополнительный жесткий диск к кронштейну дополнительного жесткого диска.
Шаг 29
Выровняйте отверстие для винта на сборке дополнительного жесткого диска с отверстием для винта на основном кронштейне.
Шаг 30
Вверните винт, который закрепляет сборку дополнительного жесткого диска на основном кронштейне.
Шаг 31
Переверните сборку дополнительного жесткого диска.
Шаг 32
Вставьте кабель дополнительного жесткого диска в разъем на системной плате и надавите на защелки разъема, чтобы зафиксировать кабель.
Шаг 33
Выровняйте отверстия для винтов на сборке дополнительного жесткого диска с отверстиями для винтов на корпусе компьютера.
Шаг 34
Вверните винты, которые закрепляют сборку дополнительного жесткого диска на корпусе компьютера.
Шаг 35
WARNING: Before working inside your computer, read the safety information that shipped with your computer and follow the steps in Before Working Inside Your Computer. After working inside your computer, follow the instructions in After Working Inside Your Computer.
CAUTION: To avoid data loss, do not remove the hard drive while the computer is On or in Sleep state.
CAUTION: Hard drives are extremely fragile. Exercise care when handling the hard drive.
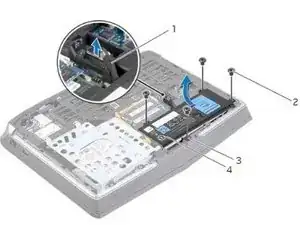
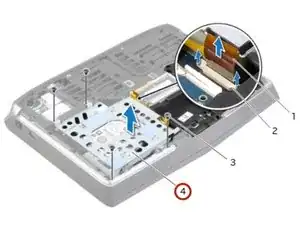
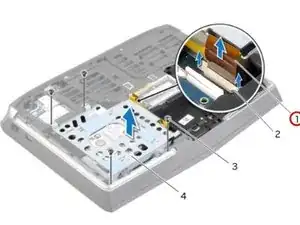
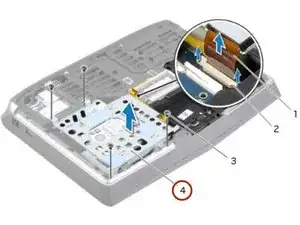
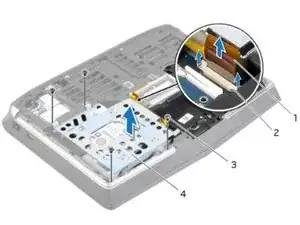
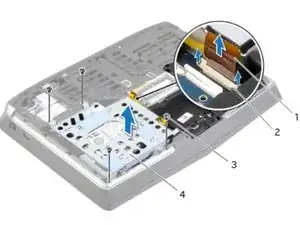
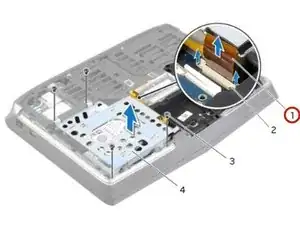
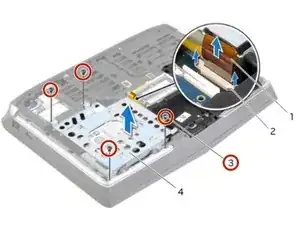
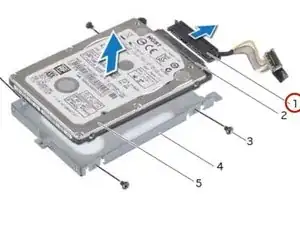
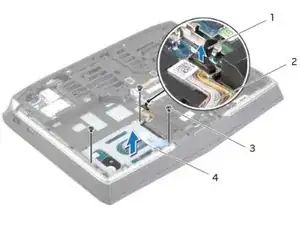
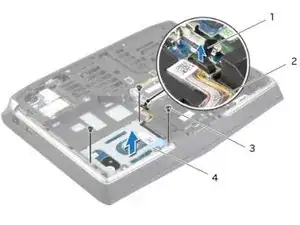
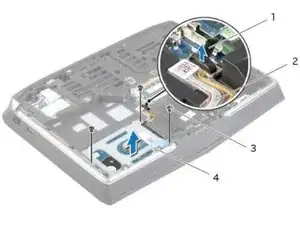
Поднимите язычок, чтобы отсоединить кабель основного жесткого диска от разъема на системной плате.
Шаг 36
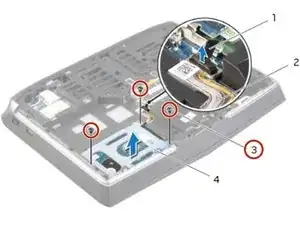
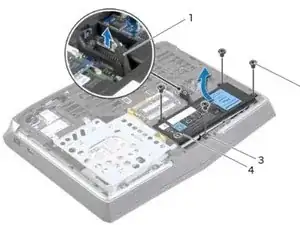
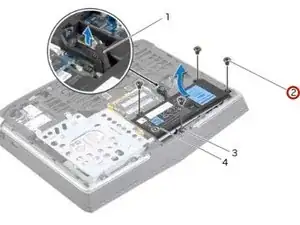
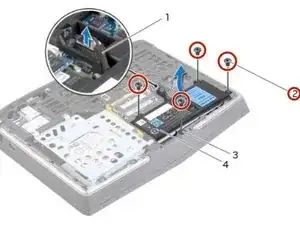
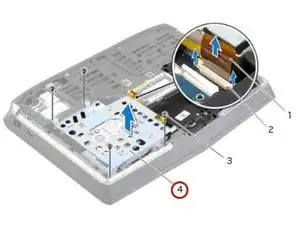
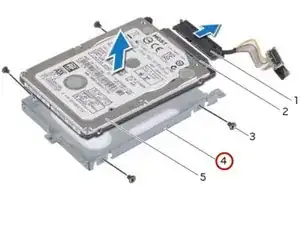
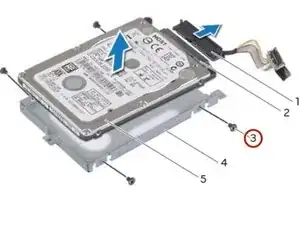
Снимите винты, которые закрепляют сборку основного жесткого диска на корпусе компьютера.
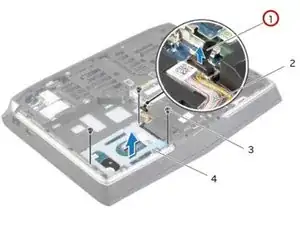
Шаг 37
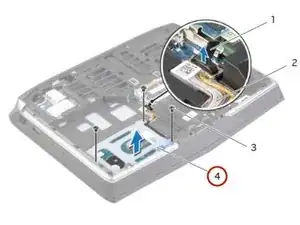
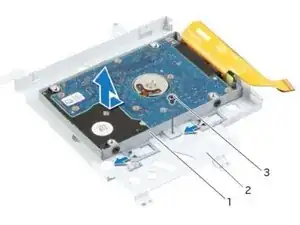
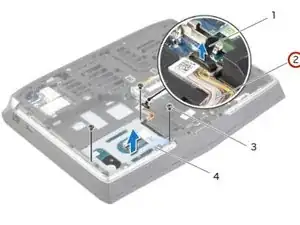
Поднимите сборку основного жесткого диска и снимите её с корпуса компьютера.
Шаг 38
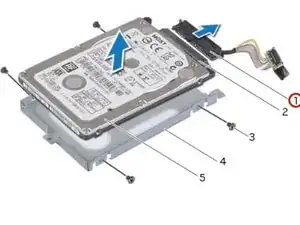
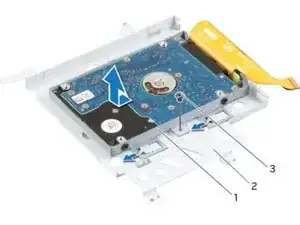
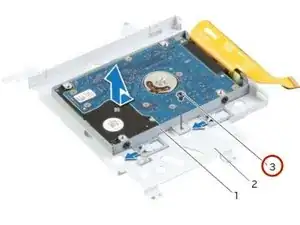
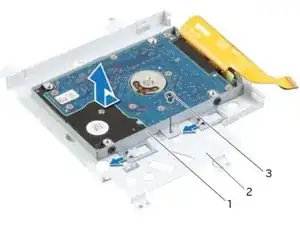
Отсоедините переходник от разъема основного жесткого диска.
Шаг 39
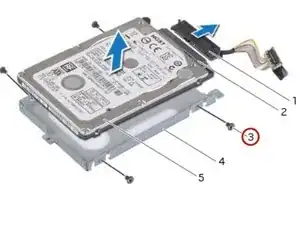
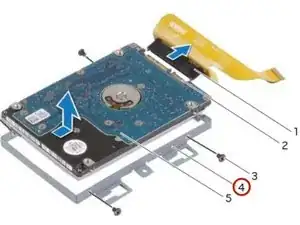
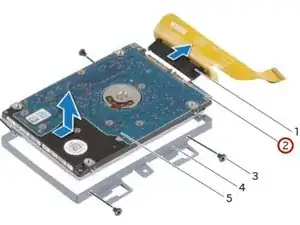
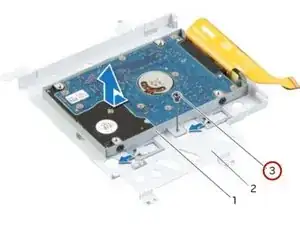
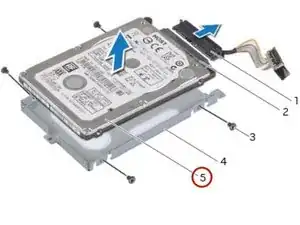
Снимите винты, которые закрепляют основной жесткий диск в кронштейне основного жесткого диска.
Шаг 40
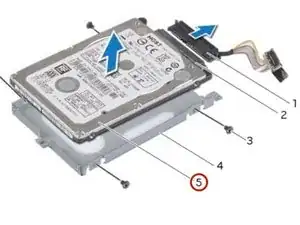
Сдвиньте и поднимите основной жесткий диск, чтобы извлечь его из кронштейна основного жесткого диска.
Шаг 41
Вставьте НОВЫЙ основной жесткий диск в кронштейн основного жесткого диска.
Шаг 42
Выровняйте отверстия для винтов на основном жестком диске с отверстиями для винтов в кронштейне основного жесткого диска.
Шаг 43

Вверните винты, которые закрепляют основной жесткий диск в кронштейне основного жесткого диска.
Шаг 44
Подсоедините переходник к разъему основного жесткого диска.
Шаг 45
Выровняйте отверстия для винтов на сборке основного жесткого диска с отверстиями для винтов на корпусе компьютера.
Шаг 46
Вверните винты, которые закрепляют сборку основного жесткого диска на корпусе компьютера.
Шаг 47
Подключите кабель основного жесткого диска к разъему на системной плате.
Заключение
Чтобы собрать устройство обратно, выполните эти инструкции в обратном порядке.
Перевод руководства с ifixit.com