Замена вентилятора PlayStation 5 Slim
Следуйте этому руководству, чтобы заменить неисправный вентилятор в вашей PlayStation 5 Slim.
Если вентилятор не вращается, вращается очень медленно или издаёт сильные шумы, возможно, его нужно заменить.
Вы также можете использовать это руководство для очистки запылённого или грязного вентилятора.
Перед покупкой нового вентилятора рекомендуется снять текущий вентилятор и удалить пыль, грязь, волосы или другие загрязнения — возможно, именно это является причиной неисправности. Если после очистки вентилятор по-прежнему работает некорректно, рассмотрите возможность приобретения замены.
Шаг 1

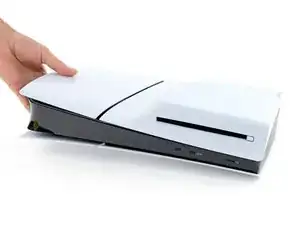
Before starting your repair:
Shut down your console and unplug all cables and accessories.
Remove any stands supporting your device and lay it down.
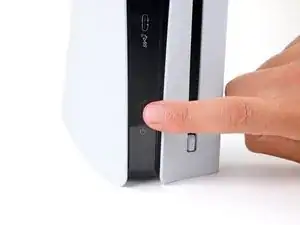
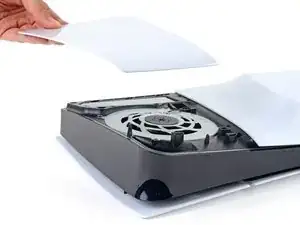
Шаг 2
Lay your PlayStation on its side so the right side covers are facing up.
Шаг 3

The cover is secured with hooks along the back edge and clips along the front edge.
Firmly pull up the front edge of the smaller, upper cover to release the clips.
You'll hear distinct "pops" as the clips disengage.
Remove the cover.
To reinstall the cover, place the hooks into their cutouts along the rear edge and firmly press the front edge of the cover into place to re‑engage the two clips.
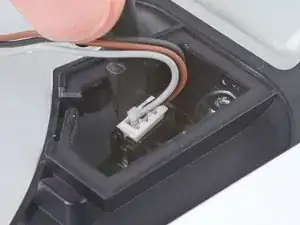
Шаг 4
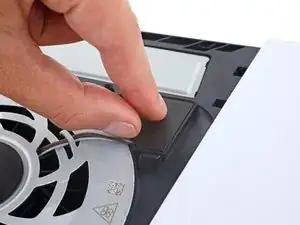
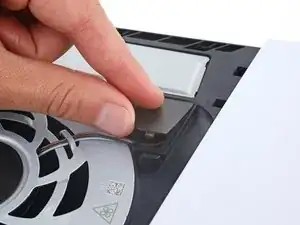
A piece of plastic covers the fan cables connector.
Use your fingers to remove the plastic cover.
During reassembly, press the piece of plastic back into place to secure it with the leftover adhesive. If it isn't sticking, use strips of double-sided tape to secure it.
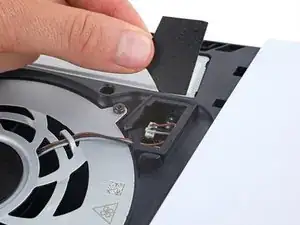
Шаг 5
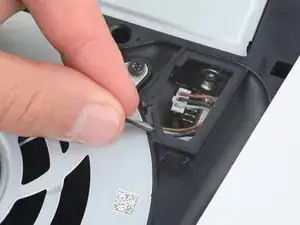
Gently pull the fan cables out from under their plastic clip on the frame.
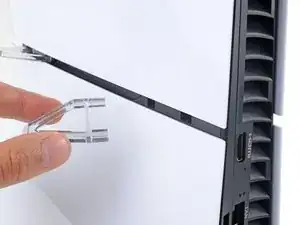
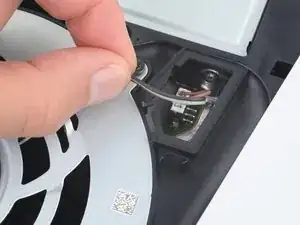
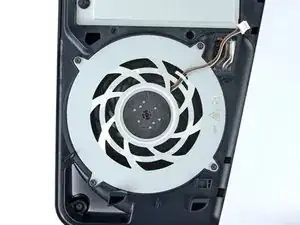
Шаг 6
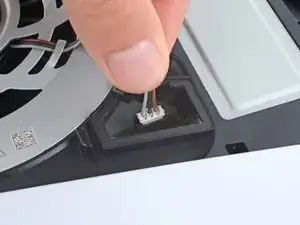
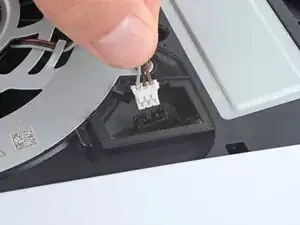
Firmly grip the fan cables' white connector head and pull it straight up and out of its socket.
If you're having trouble, grip the cables just above the connector head, and gently pull.
During reassembly, align the connector over its socket and push down on the edges with the flat end of a spudger until it slides fully into its socket.
Шаг 7
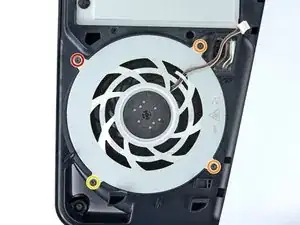
Throughout this repair, keep track of each screw and make sure it goes back exactly where it came from.
Use a T8 Torx Security screwdriver to remove the four screws securing the fan:
One 31.2 mm‑long screw
Two 21.3 mm‑long screws
One 11.6 mm‑long screw
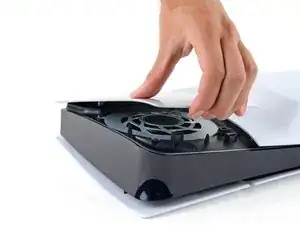
Шаг 8
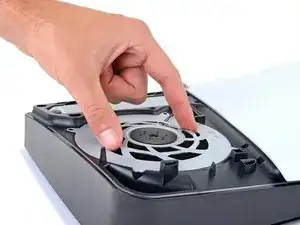
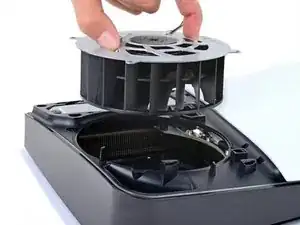
Use your fingers to grab the fan by its vents and lift it straight up to remove it.
If you're using this guide to clean your fan, use compressed air and a clean cloth to remove any dust or dirt.
During reassembly, insert the fan so its cables are near their connector.
Заключение
To reassemble your device, follow these instructions in reverse order.
Take your e-waste to an R2 or e-Stewards certified recycler.
Repair didn’t go as planned? Try some basic troubleshooting, or ask our Answers community for help.
Перевод руководства с ifixit.com